background

Showing posts with label chocolate. Show all posts

Wednesday, March 16, 2011

Nutella crepes

   I have a small problem when I am pregnant if I hear or see something that sounds yummy to eat  I CAN NOT stop thinking about it until I have it.  It is proving to be quite inconvenient and quite the increase in calories....  well I was looking through my Paris pictures from this fall and saw a picture I took of my husband eating a very messy crepe. I will not share that picture, well because it would be very mean, but it instantly got my crepe wheels turning and I HAD TO HAVE ONE!!!   So instead of jumping on the next 747 I thought I can make this here no problem.  I watched and ate so many being made there it is a a little embarrassing. The technique may seem tricky but after the first few you will be a pro.  You can watch a  youtube video to see someone demonstrating if you like
Recipe found at the recession cookbook
 Ingredients
SWEET CREPE BATTER
2 eggs
1 cup milk
1/4 cup water
2 teaspoons vanilla
1 cup all-purpose flour
2 tablespoons sugar
2 tablespoons melted butter
Makes about 20 crêpes

  Toppings 
I used Nutella,
banana
powedered sugar
  A friend I had over suggested using peanut butter too so we mixed that in  with the nutella. That was our favorite!!!

Place all the ingredients in a blender and blend until smooth. If you don't have a blender, whisk the eggs, milk, water, and vanilla together in a bowl until smooth. Add the flour and sugar and whisk to combine. Whisk in 2 tablespoons of the melted butter. Strain the batter into another bowl. Cover with plastic wrap and place in the refrigerator for at least an hour to allow all the air bubbles to settle.

Heat a small crêpe pan (or nonstick skillet) over medium high heat. Swirl 1 teaspoon of butter in the pan and add a small amount of batter to the pan--swirl the pan so that the batter evenly and thinly coats the bottom.

 
Cook for about 30 seconds (until lightly browned) and flip. Cook for another 10-15 seconds and remove to a plate.

Continue cooking the rest of the batter, adding additional butter every third crêpe or so. Place the crêpes on a sheet tray and keep warm in a 225 degree F oven until ready to serve.

To serve: Spread each crêpe with your desired topping: Nutella, banana, warm chocolate sauce, jam, butter and sugar, lemon, etc. and then fold in half, then into fourths, like a napkin or you can roll it like carpet.  . Dust with powdered sugar and serve warm.


Crap now after writing this and seeing the pictures I have to go make them again.....

Monday, January 24, 2011

The Chewy!!! My new favorite cookie

    I think everyone is always on the search for the best chocolate chip cookies.
  I know I can not say these are the best C.C.C. ever because everyone has different criteria. These hit mine dead on. Buttery, thick, chewy, rich, lots of chocolate... so good. The only draw back about them is letting the dough chill. That is why I had not made them before now. If I want cookies I make them and in 20 minutes I want to be eating them right out of the oven. Call me impatient, but I thought these might be worth the wait. They totally are. I will be making them again in a hurry! The melted butter gives it a different flavor almost butterscotch... but that is why they have to be chilled complety.
These are from Alton Brown, he is a food genius... I know whatever that man cooks up is good eats and I trust him with my cookies...


The Chewy (from Alton Brown)

2 sticks unsalted butter
2¼ cups bread flour  (if you do not have bread flour, you can use AP just use 1/4 more)
1 teaspoon kosher salt
1 teaspoon baking soda
¼ cup  white sugar
1¼ cups brown sugar
1 egg
1 egg yolk
2 tablespoons milk
1½ teaspoons vanilla extract
2 cups (12 ounces) semisweet chocolate chips

Hardware:
Ice cream scooper (#20 disher, to be exact)
Parchment paper
Baking sheets
Mixer

Directions

Heat oven to 375F.
Melt the butter in a heavy-bottom medium saucepan over low heat. Sift together the flour, salt, and baking soda and set aside.
Pour the melted butter in the mixer’s work bowl. Add the sugar and brown sugar. Cream the butter and sugars on medium speed. Add the egg, yolk, 2 tablespoons milk and vanilla extract and mix until well combined. Slowly incorporate the flour mixture until thoroughly combined. Stir in the chocolate chips.

Chill the dough,(like a few hours it has to be very cool when using melted butter). Then scoop onto parchment-lined baking sheets, 6 cookies per sheet. Bake for 10-14 minutes or until golden brown, checking the cookies after 5 minutes. Rotate the baking sheet for even browning. Cool completely and store in an airtight container.

 Some of my notes about the cookie they were a bit greasy at first, but once they cooled it was like heaven I literally ate so many of them I am ashamed to say how many and I honestly lost count.  Yeah that good.

   a sneaky hand tries to snatch a cookie!

Wednesday, December 22, 2010

chocolate-peanut butter- sandwiches

  At church  I am a leader to the little girls who are 8-11 years old.  twice  a month we all get together and do fun activities....  Could there be anything cuter? I love these girls they are so fun!!!
   A few weeks ago we made treats to leave as surprise on someones door step.  We have over 20 girls so we try and do fun but simple ideas.  These treats were so simple even your smaller kids can help and they were well lets say really really good.   I made sure all the leftovers were taken away so  I would not be tempted.  But then  a cute little girl brought me a whole plate. My son is allergic to peanut butter.  So like any caring, responisble mother would do I ate them all. I didn't want to chance him finding them and get sick.   Any loving mom would do it, it was for my child.  Don't judge!
   These truly are so simple and quick so if you still have room on your goodie plates for friends and neighbors these have to go on them.
  The best part is you do not even have to turn on your oven or go to the store I bet you have all the ingredients in your pantry.

  Ingredients
40 ritz crackers
1/2 cup creamy peanut butter
1 pound semi sweet chocolate chips
    Directions
    Spread peanut butter onto one cracker and top with another cracker to make a sandwich. Repeat with all the crackers. Melt chocolate I use a double boiler or in a bowl in the microwave in small increments  if the chocolate seems too thick add 1T of oil . Dip each sandwich into chocolate with a fork, tapping excess back into the bowl. Place onto wax paper to cool. Allow to set. Store between layers of wax paper. These freeze very well.

    You could change it up too different kinds of chocolate or put sprinkles on top or drizzle with chocolate.

    Saturday, December 18, 2010

    peppermint bark popcorn


    If you liked my peppermint bark  you will love it on popcorn.  This is a fun treat to fill goody bags for a class party or small neighbor gifts.  A little goes a long way,  It is so addictive and yummy and easy to make.

    16-20 C popped popcorn (fresh, or about 2 bags microwave popcorn)
    1 lb Almond Bark
    1 6oz box candy canes, crushed. (About 1-1 1/2 C total and Bob's are the best!)
    2 tea. peppermint extract, or a few drops of peppermint oil
    *one bag microwave popcorn has about 10 cups in it, so if you're air-popping, do about 20 cups.
    Place popcorn in a very large mixing bowl.
       Unwrap all the candy canes and just like for the bark I place them in a zip lock bag and hit it with my rolling pin or let me kids do it.  it is fun!
      Then in the microwave in one minute increments  melt your chocolate stirring often. It is safer to melt in a bowl over  boiling water make sure not to let the water touch your bowl.  I am sometimes too lazy.
      After chocolate is smooth. Pour in peppermint.   In large bowl pour crushed candy over popcorn then pour melted chocolate over as well and mix carefully.
     Then lay popcorn out on cookie sheet to let dry. Once dry break into seconds and put into bags and enjoy.   
     Note:  In the past I have drizzled dark chocolate over the top too.  It is really pretty I just forgot this year til too late.
       Recipe from Our Best Bites

    Wednesday, December 15, 2010

    peppermint bark

       One of my favorite treats around the holidays is peppermint bark. I remember being in William and Sonoma many years ago seeing it there Peppermint bark. I was intrigued and luckily they had taste samplings.  I fell in love.  Can you tell I really like mint and chocolate together.....?    for one pound of it, they were charging almost $30 including tax.  Seeing I am too cheap to shell that kind of money out, I knew I could re create this. And so can you!!!
     

    Peppermint Bark

    *12 oz chocolate chips  (semi sweet)
    *1 pound white chocolate chips ( good quality.. see tips)
    1/2 t peppermint extract (if using oil use less just a few drops)
    1/2 cup peppermint candy, crushed ( pup it in zip lock bag and  whack with rolling pin or give t o my kids to help.

     Directions
    Preheat oven to 250. Line a 9x13 pan with foil, letting it hang over the sides. Spray foil. Pour the chocolate chips in an even layer on the foil. Place in oven for 5 minutes or until almost melted. Remove from oven, smooth with an offset spatula or knife. Place in refrigerator until cold and firm, about 20 minutes.
    Melt white chocolate chips in a double boiler or in a metal bowl over simmering water (don’t let bottom of bowl touch water), until chocolate is almost melted. You can use your microwave for this if you’re brave! Remove bowl from water and stir until completely melted, stirring in extract. Let cool a little bit so it doesn’t melt the chocolate layer when you pour it on top. Pour this over chocolate layer, and, working quickly, spread to cover. Sprinkle with crushed candy.
    Chill until both layers are firm. Lift foil out of pan and shake off excess candy. Trim edges.  Peel bark from foil and cut each strip as desired. Chill in covered container. Makes about 2 pounds.
    Tips  for Perfect Bark:
    1. Don't make the layers too thin as this can cause the layers to separate.
    2. Take the bottom layer out of the frig a few minutes prior to spreading the top layer. Sometimes if the bottom is too cold, the top will set but may not bond completely with the bottom. 
    3. If there's condensation on the bottom when you remove it from the frig, sometimes this prevents the top from sticking to it, as well.
    4. *I use white chocolate chips that contain cocoa butter (guittard is a great brand), which are good quality chips. Read the label as the kind of white chocolate you use may affect the bonding.  I also use a good quality semisweet chocolate chips - again, read labels - the label should say they are real chocolate, not "chocolate flavored".  I have used the white and chocolate  flavored "barks"  that are sold in blocks, the taste is so much better with real chocolate and when using multiple layers a good quality is the best.
    5. Let the bark sit out a few minutes before you try to cut or break it apart.
       recipe adapted from Ritas Kitchen

    brownie covered oreos

    Updated: I have also made them again and I followed Missys advise and put more batter under the oreo before baking. They were wonderful we ate them all before I thought I should document they came out I only had one left.


    Just to prove to you that not everything I make looks picture perfect here is one of my recent flops.  I attempted making  Brownie Covered Oreo's I saw over on Picky Palate. Jenny is a genius at creating concoctions, This looked wonderful!,  this one however did not work for me.  Totally my faulty not hers,  I could not get my brownie oreos out of the pan successfully. Maybe I had too little batter my Oreo's wouldn't stay together,  I drowned my pan with spray,  so they couldn't stick, but still did. I also did the knife trick.  I was as reading her comments and I guess many people had the same problem and it all has to do with the size of your muffin tin.  it is regular size, but  guess they all vary slightly.. Not mini tins*

      So here I hope you feel better we all have kitchen mishaps and not everything turned out perfect.  Just keep cooking!

    ps they still tasted good. I was going to throw out the not so pretty ones and Rina my exchange student said her friends would eat them.She took them with her today and at lunch she opened the container and everyone swarmed her and gobbled up  20 of them before she even got one herself.  They fully approved and thought they were perfect!
      If you would like to try them I am sure you could have better luck than I did and like I said they tasted great! here is the recipe

    Brownie Covered Oreos

    1 Brownie mix (or use your own brownie recipe)
    1 package Oreos, I used the mint ones (jenny used the red holiday)
    White chocolate, melted for drizzle, or Wilton White frosting pen works great
    White nonpariels Sprinkles
    1.  Preheat oven to 350 degrees F.  Prepare brownie batter according to package directions.  Leave in mixing bowl.  Dip Oreos in brownie batter then place in bottom of cupcake tins that have been generously sprayed with cooking spray.  Bake for 12-15 minutes, until brownies are cooked through (doesn’t take long).  As soon as you remove, take a plastic knife and run along edges, (this is VERY important so you get the cookie out with brownies not stuck to pan :)
    2.  Let cool for 5 minutes, remove drizzle with melted white chocolate or the Wilton White icing pen, sprinkle with nonpariels and EAT!  Enjoy :)
    Makes entire package of Oreos
    * TIP*   a cute friend of mine  Missy made  these last night for my cookie exchange party.  She figured out the problem was I did not have enough batter under the oreo.  she put a small spoon of batter down then dipped oreos and they came out like a dream.  Thanks Missy.  Yours were pretty and yummy!

    Monday, December 13, 2010

    Mint Chocolate Chip Cake Mix Cookies

       So I am totally suffering from  sugar induced zombie mode.  That is where I should be in a coma from all the sugar, but I just can't possibly be because I have way to much to do.  So instead I am feeling nauseous, tired and grouchy.  In fact my little 3 year old told me today, "Mommy if you keep getting so mad at me when I am naughty Santa won't bring you any presents this year!!!!"....  he is right... too bad he can't keep his own advice. My answer was well if you were not naughty I wouldn't get so mad.  Moral of the story I am grouchy because all I have done is baked and ate cookies for 2 weeks straight. I have probably made 20 dozen cookies,  but tomorrow I am on my last 5 dozen and then no more... at least for a week.
      That is a lot of cookies... so what have I been baking?  Here is one of my new favorites.  It is from Real Mom Kitchen  she is a pioneer of cooking blogs. I love hers.  I saw this recipe last week on the cookie exchange that I was part of on The girl who ate everything.  This recipe was posted on the day that I remembered I signed up to bring 3 dozen cookies to my church's live nativity that night (which was amazing)  I think they should do it every night until Christmas.  Anyways these cookies looked simple and delicious. A great combination.
       It is based in one of those box cake mix cookie recipes.  I used the Nestles mint and dark chocolate chip mix.   I LOVED them.  I whipped up these cookies so fast, then made another batch and froze them for part of my neighbor gifts.
     You could use Andes mints or those Hershey candy cane kisses cut up.  those are great, or anything you like as long as it is mint.  Mint and dark chocolate go hand in hand so nicely!
    Mint Chocolate Chip Cake Mix Cookies
    • 1 box Betty Crocker Dark Chocolate cake mix
    • 2 Tbsp brown sugar
    • 2 eggs
    • 1/3 cup oil
    • 2 Tbsp water
    • 1 (10 oz) bag Nestle Dark Chocolate and Mint Morsels
    1. In a bowl of a stand mixer, mix the cake mix, eggs, oil, and water together until a soft dough forms.
    2. Fold in the dark chocolate and mint morsels.
    3. Drop by the spoonful onto an ungreased cookie sheet and bake at 350 degrees for 8-10 minutes until set in the middle. Make around 2 dozen cookies.

    Tuesday, December 07, 2010

    peanut butter blossoms take 2

    Last week I posted these peanut butter blossoms.  A reader of mine and a friend who happens to be a cookie queen.  She makes the best cookies (she actually sells them too)  she gave me this recipe. I thought it was fun and different and so quick and easy. 
     Last night I was taking dinner to a  friend who just had a baby, and with 20 minutes left before I needed to deliver I realized I had no dessert to bring.  I know, I know I have been baking all week, my freezer should be bursting with cookies, but I have to admit i have no idea where they all went, but besides a few crumbs there are gone....  my bursting buttons could point to the problem, but lets ignore that fact... I needed cookies NOW!
       So I whipped these up from start to finished on plates going to her house it was 15 minutes.  That is my kind of Cookie.  and so good too.

    this is the same picture as the ones I made before, but they look he same and this time they were out the door too fast to take a picture!

    Hershey Kiss Cookies
     Carrie Paternoster
    1 Can Sweetened Condensed Milk
    ¾ cup Peanut Butter
    2 cups Bisquick Baking Mix
    1 tsp vanilla
    1 bag Hershey Kisses
    Cream the condensed milk and peanut butter. Then add the Bisquick and vanilla. Mix until combined. Form dough into small balls, about the size of a large olive. Roll dough in a bowl of granulated sugar to coat the whole ball. Then place on baking sheet. Bake at 375 degrees for 6 minutes. Then pull out of oven and press a Hershey Kiss in the top of each cookie. Return to oven for 1 more minute and no longer! Cool on pan for about 5 minutes then transfer to a cooling rack . Will take a couple hours for kisses to totally cool off and set up again.
    *Tip: Unwrap all of your Hershey Kisses before you put any cookies in the oven. You have to have them all unwrapped and ready to quickly press into the cookies after the 6 minutes
      Thanks Carrie they were a great success.

    Monday, December 06, 2010

    Peppermint Chocolate Crinkles

    On Thanksgiving my parents were home in Sacramento, California and I was here is Meridian Idaho...sad.  I always am sad not to be with my family for a holiday.  There is always such great food there and I feel like I am missing out ( I am also eating good food here too, but still).  Everyone passes around the phone and tells me about there dishes. One dish that stood out besides the turkey and stuffing was a cookie recipe a  great family friend Barbara brought for  dessert: Chocolate Crinkles.  So many people all told me about them. I surprisingly had never these cookies either. I was excited to make them.
       One of my rules is always make the dish the first time by the recipe then you can change things the second time I make it.   I made them regular... they were fantastic then I made a batch adding peppermint extract  to make them a little more festive. I love them both ways.  This would be a great cookie to bring to a cookie exchange this season.
    Printer friendly recipe
        Ingredients

    1 Half Stick of Butter (1/4 cup)
    4 (1-ounce) squares unsweetened baking chocolate
    2 t. peppermint extract
    2 cups all-purpose flour
    2 cups sugar
    4  Eggs
    2 teaspoons baking powder
    1/2 teaspoon salt
    Powdered sugar

    Directions

    Melt butter and chocolate in 1-quart saucepan over low heat, stirring occasionally, until smooth (8 to 10 minutes). Cool completely (30 minutes).

    Combine melted chocolate mixture,stir in peppermint extract, 1 cup flour, sugar, eggs, baking powder and salt in large bowl. Beat at medium speed, scraping bowl often, until well mixed. Stir in remaining flour . Cover; refrigerate (2 hours).

    Heat oven to 300°F. Shape dough into 1 1/2-inch balls. Roll in powdered sugar very generously. Place 2 inches apart onto greased cookie sheets. Bake for 13 to 16 minutes or until set. 
     
    Leave on cookie sheet for two minutes then transfer to cooling rack.
     
    Chilling the dough makes it much easier to mold into balls it can be really sticky if not very cold and hard.
       Also for better cracking put the cookies on the second from the top rack in the oven.

     recipe adapted from Land O'Lakes

    Friday, December 03, 2010

    my one weakness.....

    Chocolate and peanut butter.  It really is  weakness of mine! Lately I have been watching this BBC show called Lark Rise to Candlewood. A series my family got me started on,  it is really good anyone else heard of it??  I am alone?    Anyways this postmistress lady in the show says after every pleasure she indulges in says, "This is my one weakness".  It is an excuse to indulge. I feel the same way so often....  If only peanut butter and chocolate were my only weakness, but they are a huge one for me and these are some of my favorites!!!!!
      I have been making these for years maybe a decade. I always experiment with different variations on the dough.  These seem to be my favorite.

    Peanut Butter Blossoms
    Makes about 3 dozen cookies
    Ingredients
    3/4 cup creamy peanut butter
    1/2 cup butter
    1/3 cup granulated sugar
    1/3 cup packed light brown sugar
    1 egg
    3 tbsp milk
    1 tsp vanilla extract
    1 1/2 cups all purpose flour
    1/2 tsp baking soda
    1/2 tsp salt
    Granulated sugar for rolling
    Hershey’s Chocolate Kiss’s
    Directions
    1. Preheat the oven to 350 degrees.
    2. Beat peanut butter and butter until well mixed, then beat in the two sugars until light. Add the egg, milk, and vanilla and beat until fluffy. Whisk the flour, baking soda, and salt together, then add in 3 batches to the peanut butter mixture, beating well between additions.
    3. Roll dough into 1/2 inch balls. Roll in granulated sugar and place on ungreased baking sheets. Bake for about 7 minutes and remove from oven.
    4. Immediately press a Hershey’s Kiss into the center of each cookie. Let cookies cool a minute, then transfer to a wire rack to cool completely.
    The cookies will keep for several days at room temperature in an airtight container.

    Recipe adapted from The Comfort of Cooking

    Thursday, December 02, 2010

    Peppermint- Chocolate Sandwich Cookies

    Today I am being a guest blogger over at The Girl Who Ate Everything. Christy has a great blog, right now she is hosting the 12 days of Christmas cookies.  I am grateful to be a part of it. Click on over there and get some great holiday baking ideas and leave us both some cOmMeNt LoVe!!


        I have to admit I have a thing for peppermint.  I look forward to this time of the year for an excuse to have it in everything: my ice cream, cookies,  peppermint bark, popcorn, hot chocolate, anything I can think of.  When I saw these cookies it was like the angels in my head started singing (am I the only one who hears this?)  The buttery taste of sugar cookies, chocolate peppermint ganache and crushed candy canes... yum.  The best part is eating two cookies at once.  Believe me you do not feel as guilty eating a cookie sandwich, it's not the same as eating two cookies separately:)

       I saw Giada De Laurentiis make this recipe and she used pre made Pillsbury sugar cookie dough.  I was shocked, but thought I would give it a try.  You add a 1/4 cup flour, knead it in, roll it out and cut the cookies.  So it is semi-homemade.  I was a little put off by the store bought dough, but I was pleasantly surprised. I cooked some cookies regular and some with the kneaded in flour and it really did make a difference.  If you use the pre made dough do not beat yourself up.  There are so many things pulling us in different directions during the Holidays it is okay to have a little help.  But if you have time and want to make them extra special make them all from scratch. I love this recipe from our best bites for sugar cookies. 


    Printer friendly recipe
    Peppermint- chocolate sandwich cookies
    Ingredients

        * 1 (16.5 ounce) tube refrigerated sugar cookie dough
        * 1/4 cup all-purpose flour plus extra for dusting
        * 2 cups semisweet chocolate chips, divided
        * 1/4 cup heavy cream
        * 1 teaspoon pure peppermint extract
        * 1 teaspoon vegetable oil
        * Decorating suggestion: crushed candy canes or peppermint candies; white, red and green sprinkles;            * Special equipment: a 2 1/2-inch round cookie cutter, and a 1/2-ounce cookie scoop

    Directions

    Position an oven rack in the lower third of the oven. Preheat the oven to 350 degrees F. Line 2 baking sheets with parchment paper.

    In a medium bowl, knead together the cookie dough and 1/4 cup flour until smooth. Lightly flour a work surface. Roll out the dough to 1/4-inch thick. Using a 2 1/2-inch cookie cutter, cut out circles from the dough. Knead together any scraps of dough and roll out again. Continue to cut out pastry circles until there are 24 pieces in total. Place the dough circles on the prepared baking sheets. Bake until the cookies are slightly golden around the edges, about 10 minutes. Cool for 10 minutes and transfer to a wire rack to cool completely. Reserve 1 parchment paper-lined baking sheet.

    Combine 1 cup of chocolate chips and the cream in a small bowl. Place the bowl over a pan of simmering water and stir until the chocolate has melted and the mixture is smooth. Whisk in the peppermint extract and refrigerate the mixture for 1 hour. Using a 1/2-ounce cookie scoop or a tablespoon measure, place the chocolate mixture in the center of the flat side of 12 of the cookies. Place the remaining cookies on top and gently squeeze to distribute the filling evenly. Place on a baking sheet and freeze until the filling has set, about 25 minutes.

    Combine the remaining chocolate chips and the vegetable oil in a small bowl. Place the bowl over a pan of simmering water and stir until the chocolate has melted and the mixture is smooth. Dip the top of each cookie in the melted chocolate and return to the baking sheet. Sprinkle the tops with crushed candy canes or peppermint candies. Refrigerate until firm, about 1 hour. Store in an airtight plastic container.

    Monday, November 15, 2010

    Triple chocolate cake balls


         These are seriously some of my favorite things to serve at parties, everyone grabs one because they are chocolate and look good, but then they take a bite and immediately are walking up asking how do you make this. That is a sure sign these are winners.
      Please learn from my experience and do not leave yourself alone in your house with a batch of these bite sized wonders. Before you know it they are gone,  then you might have to lie to your husband and say you brought a large, very large plate to the neighbors... and I don't wont you  lying to your husband now...:)

    I first saw them almost two years ago from  Pioneer woman  when she was shown from bakerella. there are so many different things you can do with them, cake pops, cupcake bites, and cake balls.  I did the classic cake ball. 

     Ingredients
     Triple chocolate cake balls
    1 box chocolate cake mix (cook as directed on box for 13 X 9 cake)
    1 can chocolate frosting (16 oz.)
    1 package chocolate bark (regular or white chocolate) or melting chocolate, I prefer wafers
    wax paper
    1. After cake is cooked and cooled completely, crumble into large bowl.
    2. Mix thoroughly with 1 can  frosting. (It may be easier to use fingers to mix together, but be warned it will get messy.)  Just keep mixing it will all combine.
    3. Roll mixture into quarter size balls and lay on cookie sheet. (Should make 45-50.
    4. Chill for several hours. (You can speed this up by putting in the freezer.)
    5. Melt chocolate in microwave in 30 second increments on half power til smooth add a small amount of shortening of Veg. oil if needed. to thin out.
    6. Roll balls in chocolate and lay on wax paper until firm. (Use a spoon to dip and roll in chocolate and then tap off extra.)

      A fun thing about this recipe is it is so versatile any flavor frosting or cake mix combined would be so fun. I love cream cheese frosting with red velvet cake mix.  Or carrot cake with cream cheese frosting!!!!
      You have my permission to go nuts!  Experiment with lots of different options.  Let me know what your favorite is.
    Make these at your next party and you will be the star I promise!!!

    Tuesday, March 10, 2009

    Molten Chocolate Cake


    Alrighty, so the restaurant Chili's has the amazing Chocolate Molten Cake. Remember--that's the cake that is chocolate cake with a lava flow of hot fudge in the center, and then a scoop of vanilla ice cream on top and the hard shell chocolate sauce on the ice cream and over the cake.
    Needless to say---It is sooooooo good!

    But how can you make it at home?
    I found a few ideas online and this is what I put together
    one chocolate cake ( I made mine from a box of devils food and made it into cupcakes. if you had a Texas size cupcake holders it would be better, but regular muffin size is good too.
    1 jar of hot fudge ice cream topping (warm in microwave. watch carefully though because it can go all over and hence the mess on my face a few posts earlier.
    vanilla ice cream
    chocolate sauce. you can buy magic shell or make it by taking chocolate chips (1 bag) with 3 tablespoons of butter over a double boiler. Melt until smooth.


    After cakes have cooled, cut a hole in the top and fill with fudge sauce until it is up to the top. Around a tablespoon.
    after filling each cake. Place in freezer, for at least 2 hours

    All time favorite chocolate chip cookies

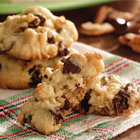
    Award Winning Soft Chocolate Chip Cookies

     PHOTO BY: Allrecipes


    INGREDIENTS
    • 4 1/2 cups all-purpose flour
    • 2 teaspoons baking soda
    • 2 cups butter, softened
    • 1 1/2 cups packed brown sugar
    • 1/2 cup white sugar
    • 2 (3.4 ounce) packages instant vanilla pudding mix
    • 4 eggs
    • 2 teaspoons vanilla extract
    • 4 cups semisweet chocolate chips
    • 2 cups chopped walnuts (optional)

    DIRECTIONS
    1. Preheat oven to 350 degrees F (175 degrees C). Sift together the flour and baking soda, set aside.
    2. In a large bowl, cream together the butter, brown sugar, and white sugar. Beat in the instant pudding mix until blended. Stir in the eggs and vanilla. Blend in the flour mixture. Finally, stir in the chocolate chips and nuts. Drop cookies by rounded spoonfuls onto ungreased cookie sheets.
    3. Bake for 10 to 12 minutes in the preheated oven. Edges should be golden brown.
    4. I usually cut mine in half, because it makes SO many cookies. they are very cake like and soft, not crunchy at all. that is how I like mine. You can add any pudding flavor you like to mix it up a bit like butterscotrch or chocolate. YUM! Love, Nicole

    BYU Mint brownies


    I used to love these brownies while at BYU and on their site the other day they had the recipe so I thought I would share!
    BYU Brownie
    Sugar-n-Spice, Cougareat Food Court
    MAKES ONE 9-BY-13 PAN OF BROWNIES.
    PREP AND COOK: 90 min. COOL: 1 hr.

    1 c. margarine
    1/2 c. cocoa
    2 Tbsp. honey
    4 eggs
    2 c. sugar
    1 3/4 c. flour
    1/2 Tbsp. baking powder
    1/2 tsp. salt
    1 c. chopped walnuts
    12 oz. chocolate icing (Use your own icing recipe or purchase some chocolate frosting. You can also search the Internet for chocolate icing recipes.)
    MINT ICING

    5 Tbsp. margarine
    dash of salt
    3 Tbsp. milk
    1 Tbsp. light corn syrup
    2 1/3 c. powdered sugar
    1/2 tsp. mint extract
    1-2 drops green food coloring

    1. Melt margarine and mix in cocoa. Allow to cool. Add honey, eggs, sugar, flour, baking powder, and salt. Mix well. Add nuts. Pour batter into a greased 9-by-13 baking pan. Bake at 350 degrees for 25 minutes. Cool.

    2. Prepare mint icing: Soften margarine. Add salt, corn syrup, and powdered sugar. Beat until smooth and fluffy. Add mint extract and food coloring. Mix. Add milk gradually until the consistency is a little thinner than cake frosting.

    3. Spread mint icing over brownies. Place brownies in the freezer for a short time to stiffen the icing. Remove from the freezer and carefully add a layer of chocolate icing.
    Related Posts Plugin for WordPress, Blogger...
